Progress
🔥 Free Preview
Rive Basics - Animate
Create the Main Screen
Dynamic Weather Buddy
⚡️ Custom Events
🔗 Data Binding Basics
📝 Data Binding Basics - Exrc
🔗 Data Binding Advanced
🔗 Data Binding Expert | Main Project
👑 Data Binding Master
☀️ Weather Animation - Clear Skies
🌡️ Weather Animation - Heatwave
☔️ Weather Animation - Rainy
❄️ Weather Animation - Snowy (Exrc)
60+ LESSONS · 9 HOURS · PROJECT BASED
Rive Masterclass Curriculum
One project. Every Rive feature. From basic animation and state machines, to data binding and scripting.
Start learning

Full Access

4
Lessons
·
25
min
Course Intro
Meet your instructor, set up your workspace, and get an overview of what you'll build.
Workspace
Artboard
Assets Panel

4
Lessons
·
17
min
Intro to Rive - Splash Screen Design
Learn Rive's interface and design your first splash screen from scratch.
Design Tools
Fills & Strokes
Artboard

3
Lessons
·
19
min
Rive Basics - Splash Screen Animation
Bring your splash screen to life with keyframes, easing, and animation fundamentals.
Keyframe
Easing
Timeline
8
Lessons
·
39
min
State Machine Basics
Master inputs, listeners, transitions, and layers to make your animations interactive.
State Machine
Transitions
Listeners
1
Lessons
·
6
min
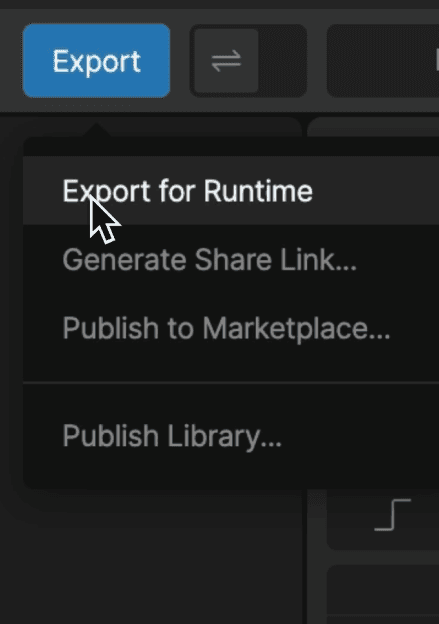
Utilities & File Management
Organize your Rive files and learn essential workflow shortcuts.
Export
Runtime File (.riv)
Backup File (.rev)

7
Lessons
·
61
min
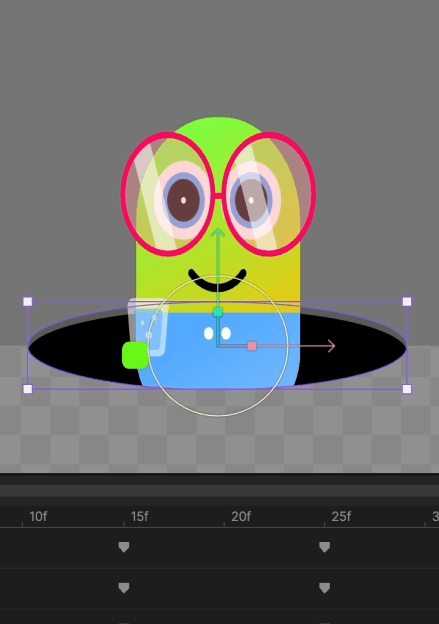
Create the Main Screen
Design and build the Weather Buddy main screen with nested artboards and components.
Design Tools
Artboard
Components
7
Lessons
·
83
min
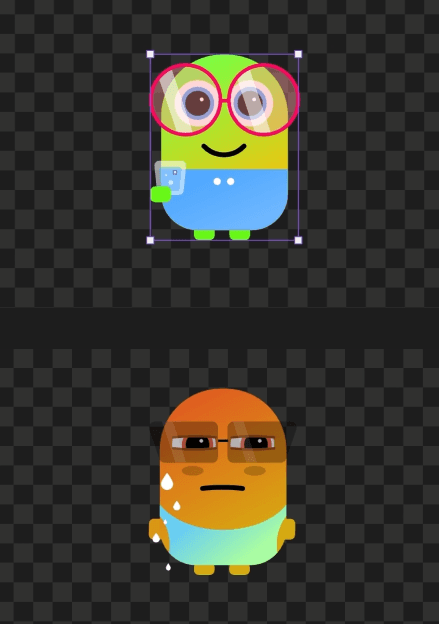
Dynamic Weather Buddy
Add particle systems, weather effects, and dynamic backgrounds that respond to state changes.
Animation Principles
Squash and Stretch
Listeners
5
Lessons
·
60
min
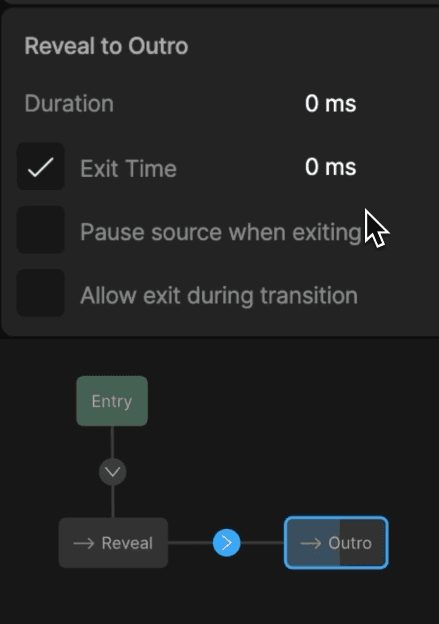
Seamless Weather Transitions
Create smooth transitions between weather states using blend states and advanced timelines.
Transition Easing
Transition Duration
Hold Mode
2
Lessons
·
23
min
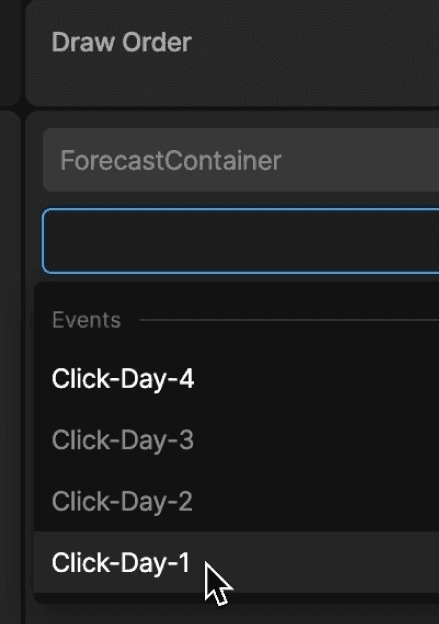
Custom Events
Fire and listen for custom events to coordinate animations across artboards.
Custom Events
Console Panel
Components

4
Lessons
·
60
min
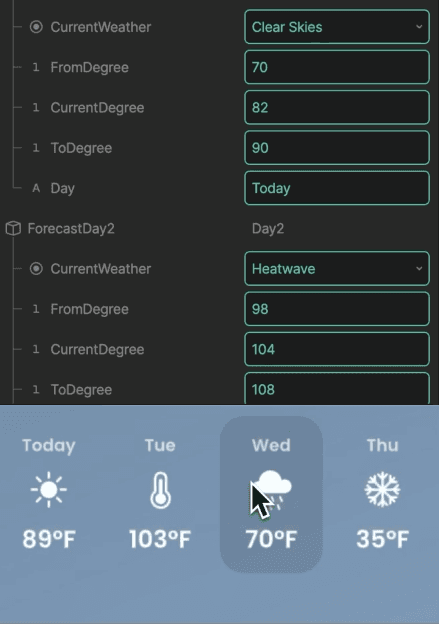
Data Binding Basics
Connect live data to your Rive animations with view models and property bindings.
Data Binding
View Model
View Model Property

2
Lessons
·
25
min
Data Binding Advanced
Go deeper with nested view models, lists, and complex data structures.
Data Binding
Converters
Enums
4
Lessons
·
28
min
Data Binding Expert
Handle enums, conditional logic, and real-time data updates in your animations.
Data Binding
Enums
Instances
3
Lessons
·
27
min
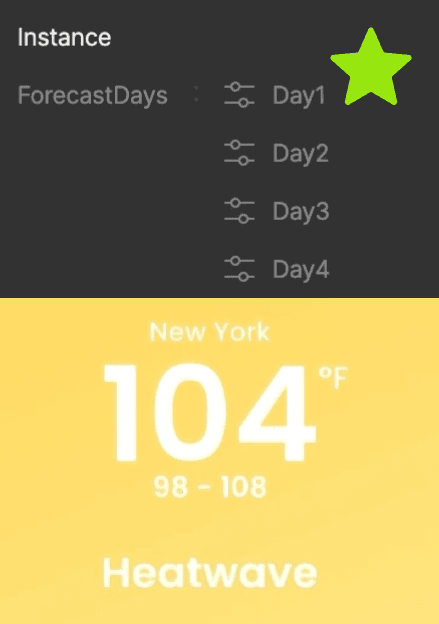
Data Binding Master
Master advanced patterns like dynamic lists, color binding, and multi-property coordination.
Data Binding
Nested View Models
Instances
4
Lessons
·
36
min
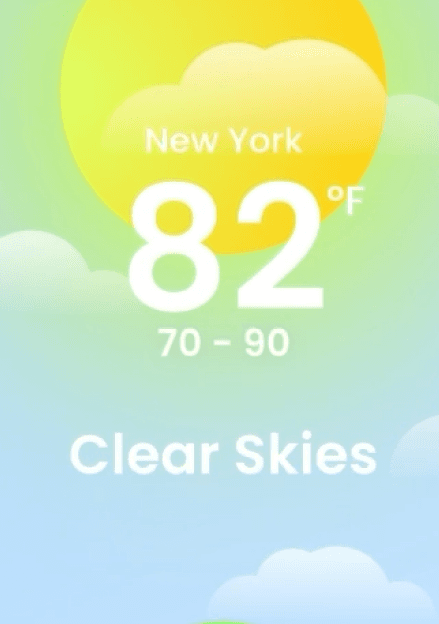
☀️ Weather Animations - Clear Skies
Build sunny weather animations with sun rays, clouds, and clear sky effects.
Glow Effect
Seamless Loop
Feather
3
Lessons
·
36
min
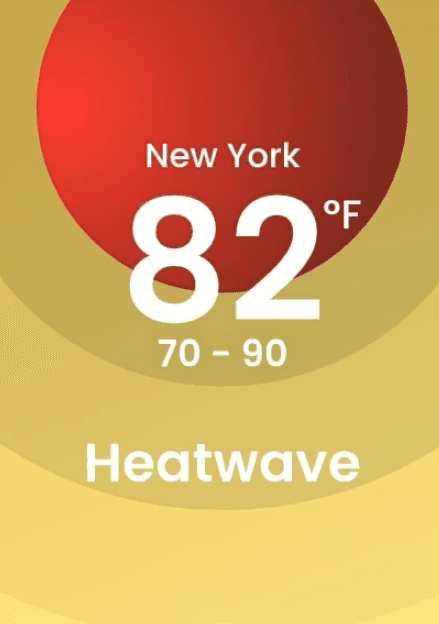
🌡️ Weather Animations - Heatwave
Create heat shimmer effects, intense sun animations, and scorching weather visuals.
Anticipation
Overshoot
Easing

2
Lessons
·
34
min
☂️ Weather Animations - Rainy
Animate rain drops, puddles, and overcast skies with layered particle effects.
Seamless Loop
Trim Path
Ease In
3
Lessons
·
Exrc
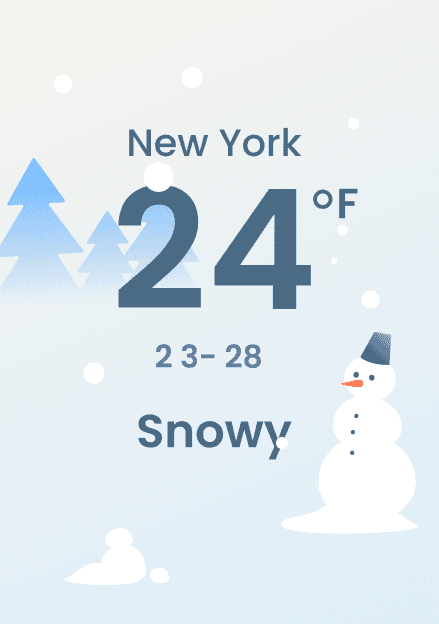
❄️ Weather Animations - Snowy
Design snowfall particles, frost effects, and cold weather atmosphere.
Animation Principles
Seamless Loop
Parallax Effect
+ 9 more
Your Final Project
Weather Buddy
Built with Rive
Full access · $149