Progress
🔥 Free Preview
Rive Basics - Animate
Create the Main Screen
Dynamic Weather Buddy
⚡️ Custom Events
🔗 Data Binding Basics
📝 Data Binding Basics - Exrc
🔗 Data Binding Advanced
🔗 Data Binding Expert | Main Project
👑 Data Binding Master
☀️ Weather Animation - Clear Skies
🌡️ Weather Animation - Heatwave
☔️ Weather Animation - Rainy
❄️ Weather Animation - Snowy (Exrc)
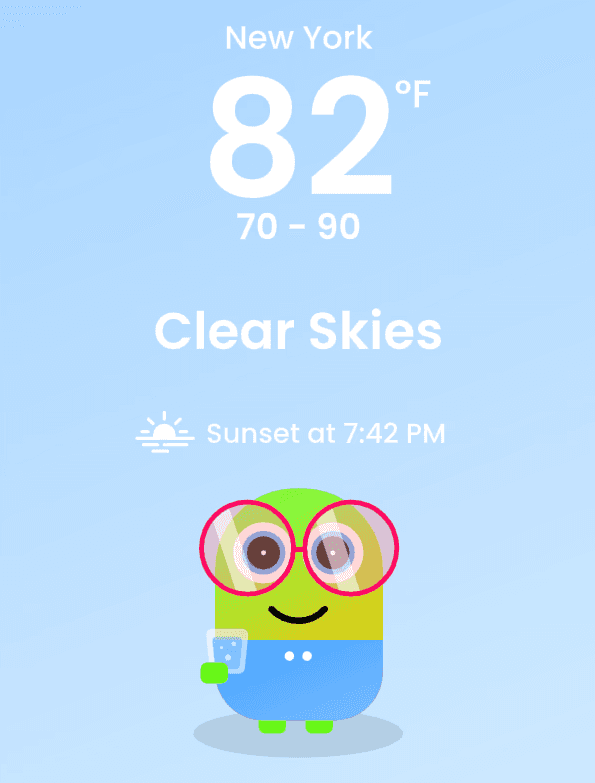
In this exercise, we’ll add a new data point to our forecast system:
a Sunset Time (sunsetTime) value that updates dynamically based on the selected forecast day.
We will complete this in four steps:
Add a new sunsetTime property to the ForecastDay ViewModel
Update this property through the Listeners so it flows into SelectedForecast
Create the UI elements (icon + text) inside ForecastDetails
Bind the new text to the sunsetTime value
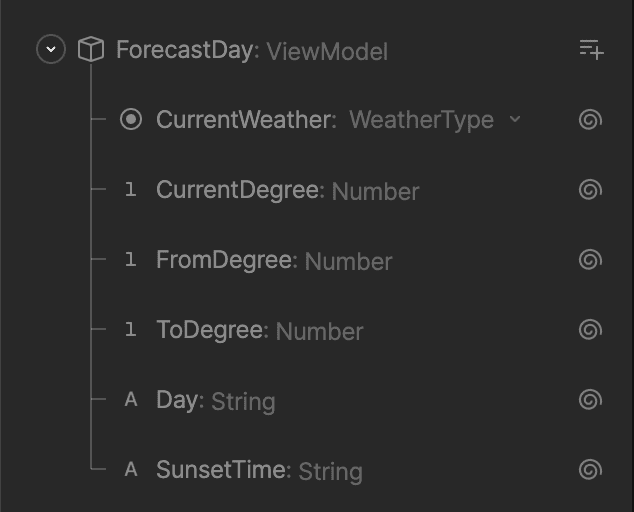
Step 1: Add sunsetTime to the ForecastDay ViewModel
Goal: Add a new property that represents the sunset time for each day.
Open the Data Panel and select the ForecastDay ViewModel.
Add a new property:
Type: string
Name: SunsetTime
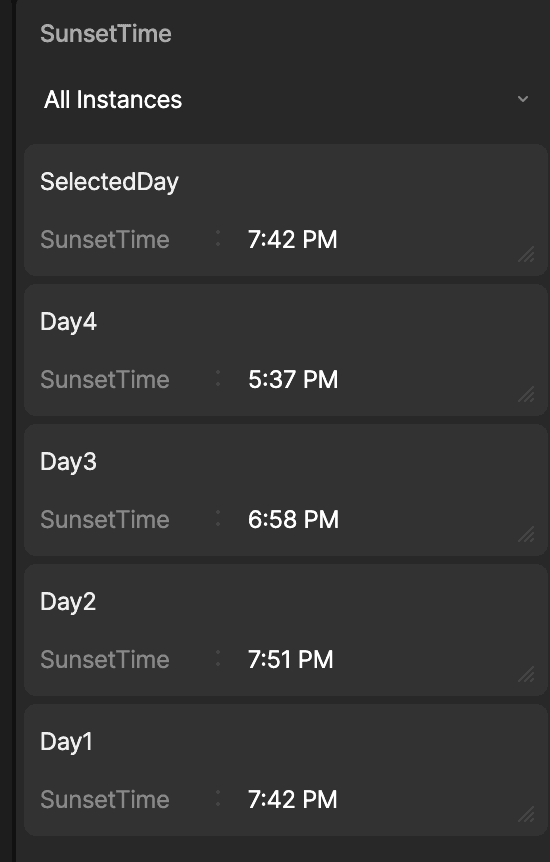
For each of the four ForecastDay instances (Day1, Day2, Day3, Day4), assign a different sunset time, for example:
SelectedDay → "7:42 PM"
Day1 → "7:42 PM"
Day2 → "7:51 PM"
Day3 → "6:58 PM"
Day4 → "5:37 PM"
Confirm in the Data Panel that each instance now has its own unique SunsetTime value.
Step 2: Update Listeners so they copy sunsetTime into SelectedForecast
Goal: Each time the user clicks a forecast-day button, the correct sunsetTime should be copied into SelectedForecast.Follow the same logic we used earlier for currentWeather, currentDegree, fromDegree, and toDegree:
Select the Listener for Day 1 (e.g., Day1Hit).
Add a new ViewModel Change action:
Target: SelectedForecast
Property: sunsetTime
Value: sunsetTime from the ForecastDay1 instance

Repeat this for all forecast-day Listeners:
Day1Hit → copy from ForecastDay1
Day2Hit → copy from ForecastDay2
Day3Hit → copy from ForecastDay3
Day4Hit → copy from ForecastDay4
Run the State Machine and check the Data Panel:
SelectedForecast.sunsetTime should switch correctly whenever a day button is clicked.
Step 3: Create the Sunset UI in ForecastDetails
Goal: Display a sunset icon + text that shows the dynamic sunset time.
Go to your main Artboard and select the ForecastDetails component.
Create two elements:
A sunset icon (add the svg icon attached to to this lesson)
A new text layer, for example "Sunset at 7:42 PM".
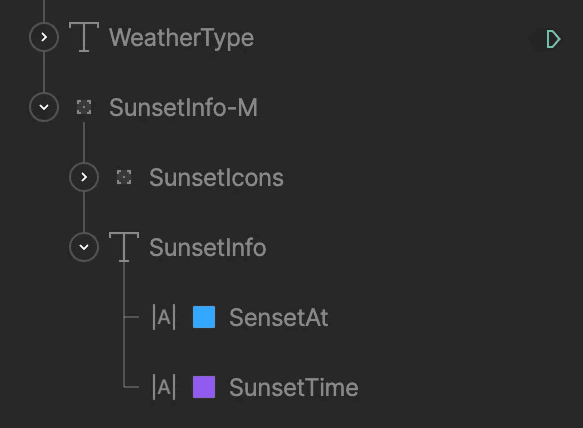
Group it and name it SunsetInfo-M
Text Settings
Make sure the text origin position is on the left
Make it 16 px and medium weight, Poppins
Name the text layer SunsetInfo.
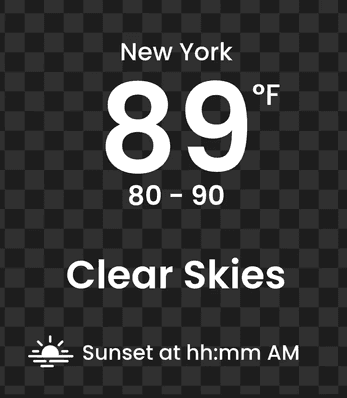
Split the text into two Text Runs:
Text Run 1 → "Sunset at"
Text Run 2 → the sunset time (this will be bound to data in the next step).
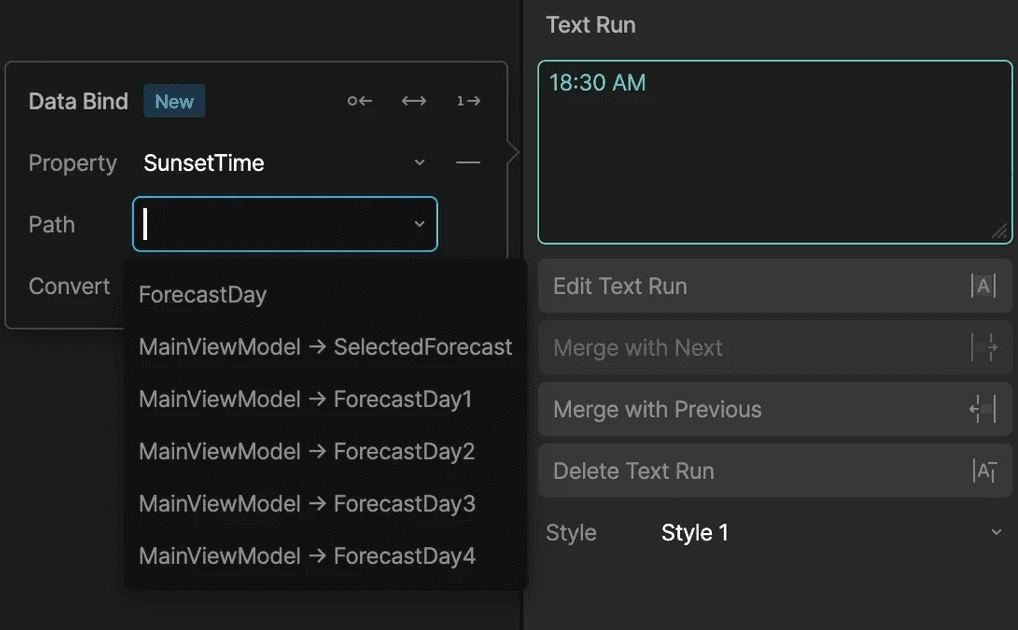
Step 4: Bind the SunsetTime Text Run to SelectedForecast → sunsetTime
Goal: Make the sunset text update dynamically based on the selected day.
Select the SunsetText layer and open its Text Run for the sunset time.
Open the Data Binding panel.
Set:
Property: SunsetTime
Path: MainViewModel → SelectedForecast
Run the State Machine and click different forecast-day buttons.
The sunset time should now change according to the selected day.
Result
You’ve now added a fully dynamic new property, Sunset Time, to your forecast system.
This property:
Is stored per-day in each ForecastDay instance
Updates through Listeners whenever the user selects a day
Displays visually in the UI with a dynamic Text Run
Perfect work - your forecast screen is now one step closer to a real, data-driven weather application.
In this exercise, we’ll add a new data point to our forecast system:
a Sunset Time (sunsetTime) value that updates dynamically based on the selected forecast day.
We will complete this in four steps:
Add a new sunsetTime property to the ForecastDay ViewModel
Update this property through the Listeners so it flows into SelectedForecast
Create the UI elements (icon + text) inside ForecastDetails
Bind the new text to the sunsetTime value
Step 1: Add sunsetTime to the ForecastDay ViewModel
Goal: Add a new property that represents the sunset time for each day.
Open the Data Panel and select the ForecastDay ViewModel.
Add a new property:
Type: string
Name: SunsetTime
For each of the four ForecastDay instances (Day1, Day2, Day3, Day4), assign a different sunset time, for example:
SelectedDay → "7:42 PM"
Day1 → "7:42 PM"
Day2 → "7:51 PM"
Day3 → "6:58 PM"
Day4 → "5:37 PM"
Confirm in the Data Panel that each instance now has its own unique SunsetTime value.
Step 2: Update Listeners so they copy sunsetTime into SelectedForecast
Goal: Each time the user clicks a forecast-day button, the correct sunsetTime should be copied into SelectedForecast.Follow the same logic we used earlier for currentWeather, currentDegree, fromDegree, and toDegree:
Select the Listener for Day 1 (e.g., Day1Hit).
Add a new ViewModel Change action:
Target: SelectedForecast
Property: sunsetTime
Value: sunsetTime from the ForecastDay1 instance
Repeat this for all forecast-day Listeners:
Day1Hit → copy from ForecastDay1
Day2Hit → copy from ForecastDay2
Day3Hit → copy from ForecastDay3
Day4Hit → copy from ForecastDay4
Run the State Machine and check the Data Panel:
SelectedForecast.sunsetTime should switch correctly whenever a day button is clicked.
Step 3: Create the Sunset UI in ForecastDetails
Goal: Display a sunset icon + text that shows the dynamic sunset time.
Go to your main Artboard and select the ForecastDetails component.
Create two elements:
A sunset icon (add the svg icon attached to to this lesson)
A new text layer, for example "Sunset at 7:42 PM".
Group it and name it SunsetInfo-M
Text Settings
Make sure the text origin position is on the left
Make it 16 px and medium weight, Poppins
Name the text layer SunsetInfo.
Split the text into two Text Runs:
Text Run 1 → "Sunset at"
Text Run 2 → the sunset time (this will be bound to data in the next step).
Step 4: Bind the SunsetTime Text Run to SelectedForecast → sunsetTime
Goal: Make the sunset text update dynamically based on the selected day.
Select the SunsetText layer and open its Text Run for the sunset time.
Open the Data Binding panel.
Set:
Property: SunsetTime
Path: MainViewModel → SelectedForecast
Run the State Machine and click different forecast-day buttons.
The sunset time should now change according to the selected day.
Result
You’ve now added a fully dynamic new property, Sunset Time, to your forecast system.
This property:
Is stored per-day in each ForecastDay instance
Updates through Listeners whenever the user selects a day
Displays visually in the UI with a dynamic Text Run
Perfect work - your forecast screen is now one step closer to a real, data-driven weather application.

Instructor
In this bonus exercise, you’ll extend your forecast instances a new Property - Sunset Time, that will represent the Sunset time of each forecast day