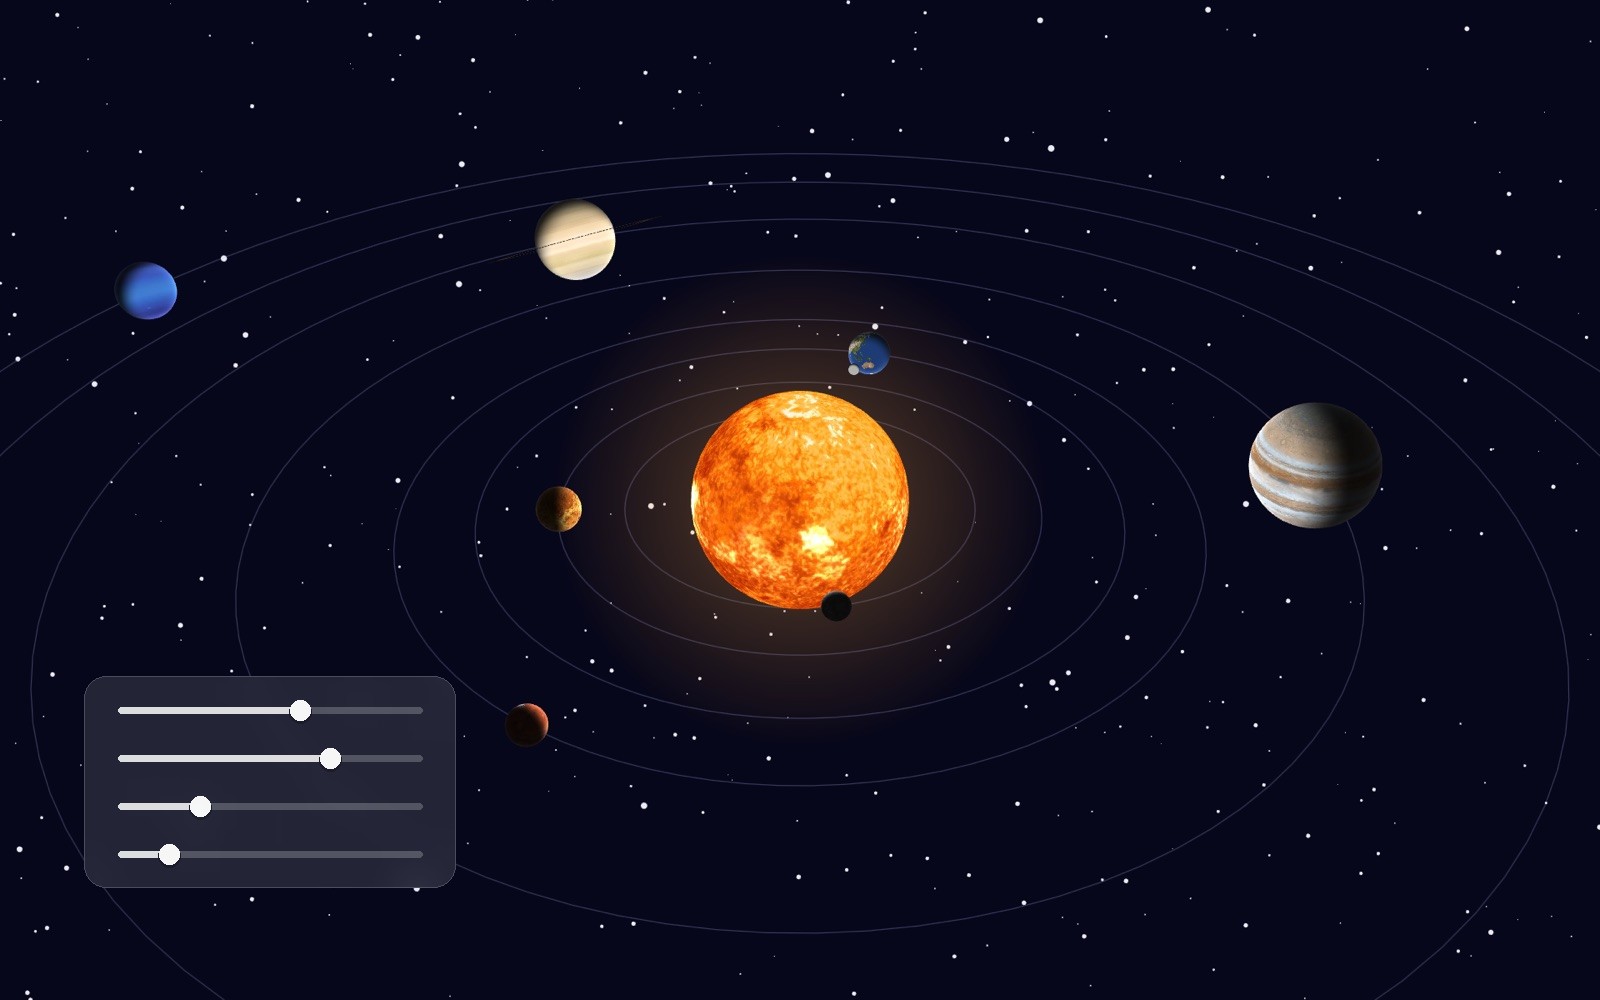
How to Build a Pokémon-Style 3D Holographic Card in Rive
I waited over a year to build this.
I love Pokémon TCG Pocket. Amazing game, and even more amazing art. The part I kept going back to is the card animation, the way the texture and the light shift as you tilt it in your hand.
I tried to build it before, by hand, with rigging. It was complicated, it was limited, and it never really looked right from more than one angle.
On September 3, 2026, Rive took GPU Canvas out of Early Access. I knew straight away this was the first thing I wanted to build with it.
So I did. Two days later, here it is.
I built it in layers. Nothing here arrived in one go, and that turns out to be the whole method: start with something basic, add one thing, look at it, add the next.
The one idea the whole thing rests on
The card face is an ordinary Rive artboard, used as a texture on a surface standing in 3D space.
That is it. The illustration, the text, the frame, even a running animation. You design that artboard the way you design anything else in Rive, then you point the 3D surface at it.
No mesh deformation, no bones, no Blender, no 3D model. And because the surface knows nothing about what it is showing, you can swap the artwork for a completely different card without changing anything else.
The artwork
I made the cards with ChatGPT, using my four Weather Buddy characters and a real Pokémon card as a layout reference.
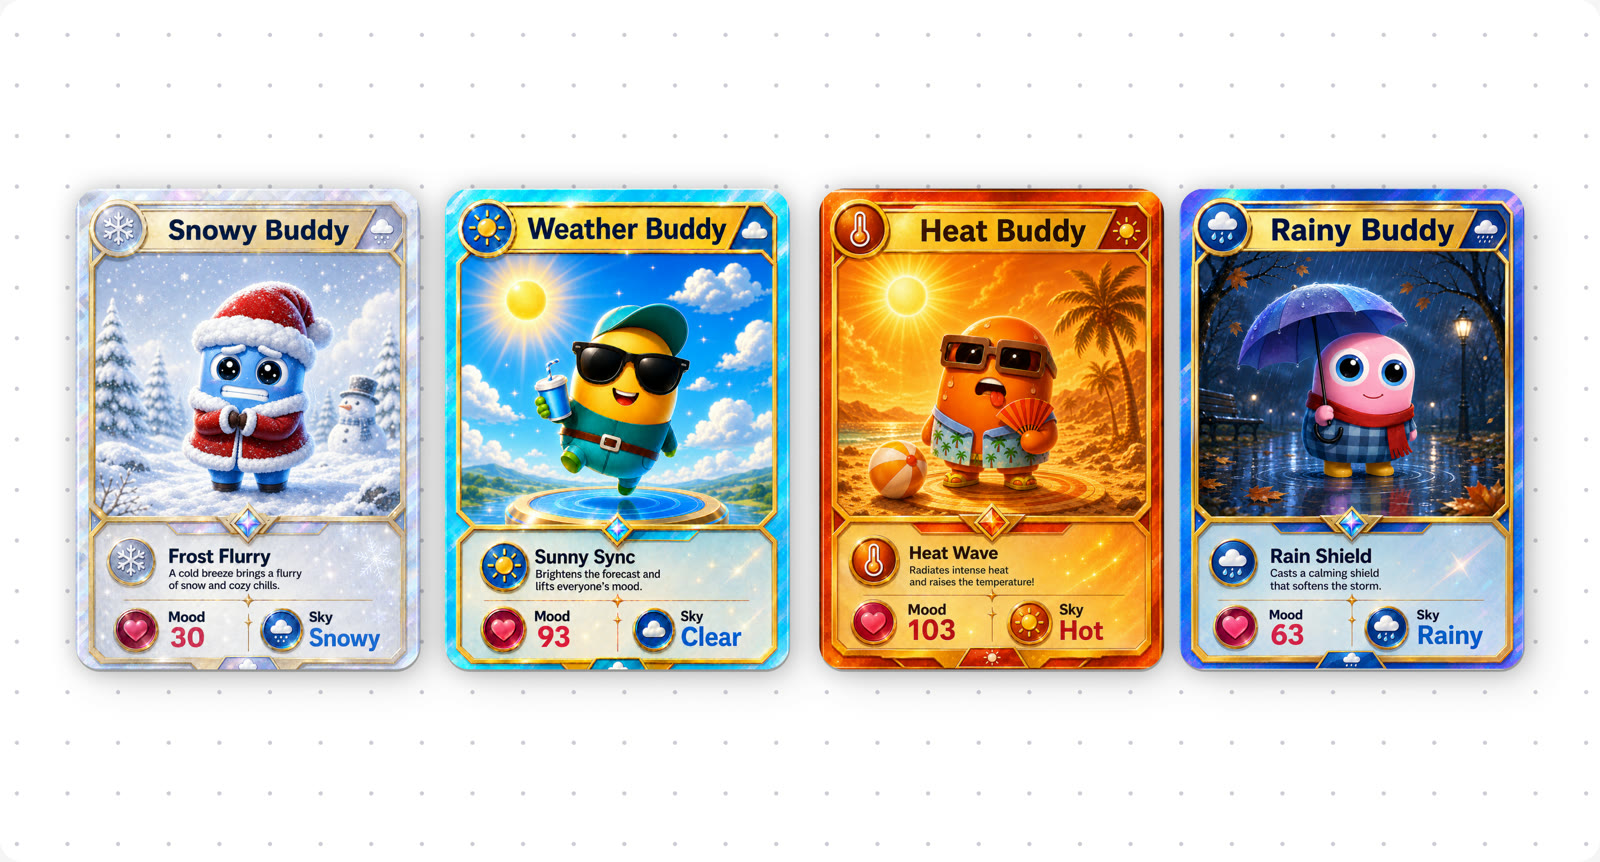
One thing worth asking for: square corners, no shadow, no holographic border. Your reference cards have all three, so the model will copy them, and they are exactly what the card adds itself later. A painted one fights the real one.
I'm making a 3D card in Rive and I need the artwork for it.

Attached are reference screenshots of the style I want, plus my mascot.
One of the references is a real Pokemon card - use it only for layout
and feel.

Keep my mascot exactly as he is and build a collectible trading card
around him: an ornate gold frame, the mascot in the top two thirds, and
a stat panel at the bottom with an ability name and two stats.

Portrait, 1260 x 1760 pixels. The artwork fills the frame edge to edge
with square corners - no rounded corners, no margin or background around
the card, and no drop shadow. The corners and the shadow get added later
in 3D.
What a shader actually is
The word comes up a lot from here on, so, one sentence.
A shader is a small program that runs on every pixel separately and decides what colour that pixel should be.
It does not draw shapes. It answers one question, millions of times at once. Because it all happens in parallel on the GPU, it is extremely fast.
Nine of them, running live. Same idea in every square, only the function changes. The last two are the ones this card uses.
Layer 1: perspective
The first thing is the card standing in space rather than lying flat on the screen.
A rectangle, a perspective camera looking at it, and the artboard painted across its surface. Turn it and you get the squeeze and the foreshortening for free, because it is genuinely in 3D rather than faked.
I'm building a 3D card in Rive.

There are two artboards in this file. One holds the artwork of a trading
card, the other is the stage the card will stand on.

On the stage, I want a flat rectangle that uses the artwork artboard as
the image painted across its surface. Take the rectangle's proportions
from that artboard itself, so the artwork fills it exactly and is never
stretched or cropped. I shouldn't have to type a width or a height.

Build it as a real 3D scene, not a flat image: a rectangle standing in
space, seen through a perspective camera, so it genuinely looks three
dimensional when it turns.

In the inspector I want exactly three properties and nothing else: the
artwork artboard, rotation on X, and rotation on Y in degrees.

Create the shader and the node script, and call the shader CardShader
and the script Card3D.
Layer 2: depth and edges
Flat is not a card. A card has rounded corners and it has thickness you can see when it turns.
Both of those are the difference between an image floating in space and an object.
Now let's make the card feel like a real card.

Add inspector inputs for scale, corner radius, thickness, and a colour
for the edge.
Layer 3: the glow
This one started as a drop shadow and became something better.
Set the colour to white, the offsets to zero, and the softness up, and the shadow becomes a glow sitting evenly behind the card. It lifts the card off the background, separates it, and adds a bit of magic that a dark shadow never would.
Rive Masterclass + Rive Scripting
Master Rive for real products.
Get Both for $219Both courses for $219. Save $49.


Rive Masterclass + Rive Scripting
Master Rive for real products.
Both courses for $219. Save $49.
Same effect. One colour and two zeros.
Add a drop shadow under the card, with colour, opacity, offset and
softness as inputs.

Draw it from the card's own shape so it keeps the same perspective and
rounded corners, and make sure the soft edge isn't cropped or cut off in
a straight line.
Layer 4: it follows you
Now it becomes interactive. The card leans toward the cursor like something you are holding and turning in your hand. Not snapping to it, easing into place, and drifting back when you leave.
Turn that easing off and back on and watch the difference. That small delay is most of what makes it feel like an object rather than a control. It is the least technical part of this build and the one that matters most.
Make the card follow the cursor, tilting toward it like a card you are
holding and turning in your hand.

Give me the maximum tilt in degrees, and how large an area the cursor
moves across to reach it.

Don't snap it to the cursor. Ease it, so it settles into place and drifts
back when the cursor leaves.
Layer 5: light
Light that moves across the surface as the card turns, rather than the whole face brightening at once. This is the layer that makes it read as real rather than as a picture.
There is one input that does most of the work: how tight the highlight is. Take it from one end of its range to the other and you go from paper to foil.
The 3D Holographic Card Kit
The finished Rive file from the tutorial, plus every prompt I used, in order, with the values I landed on. Open the file, swap in your own artwork, and you have your own card.
I did not know what any of the inputs meant. I played with the values until I liked it.
Light the card so it reacts when I turn it.

I want the light to move across the surface as it turns, like light
catching a real card, not the whole face brightening at once.

Give me controls so I can tune it.
Layer 6: the holographic texture
This is the part I could not name.
I had seen it in Pokémon TCG Pocket, that shine that travels across the card as it moves. I did not know it was called foil, or diffraction, or a holographic effect. So I took three screenshots on my phone, showed them, and said make it shine like that.
What came back had inputs called foil intensity, foil bands, foil shift. I did not supply that vocabulary. It did. I learned what the words meant by playing with the values.
This is the layer that turns a lit surface into a material.
I want to give this a final wow effect with a texture shader. A bit like
Pokemon Pocket, more like a shine - here are screenshots.

Give me controls so I can tune how strong it is, how many stripes of
colour cross the card, and how much it shifts when I tilt it.
Four cards, no changes
Point the surface at a different artboard and you have a different card. Everything else stays exactly as it was.
That is the payoff of building it in layers on top of one simple idea.
Layer 7: the scene
The last layer is not the card at all. A soft colourful background and two layers of particles, one behind the card and one in front of it.
Two layers is what sells it. The big slow ones read as nearer to you, the small fast ones as further away, and the scene gets depth out of nothing but a difference in speed.
And then it is yours
Seven layers, and the card you saw at the top.
Swap the artwork and it is a completely different card, with the same depth, the same light, and the same shine.
What I did not know
This is the most useful thing here, so I want to be straight about it.
I do not write shaders. I did not know what foil was, in the sense of what physically makes it work. I did not know what most of the lighting inputs were supposed to do.
What I did was describe what I wanted, one layer at a time, and then ask what each input did. For the foil I gave it three screenshots and said make me this. It knew what it was, even though I did not.
You do not need to learn 3D graphics to use this. You need to be able to describe what you want, and to add one thing at a time.
Two honest caveats. This file went through around forty attempts, so treat everything here as a starting point rather than a recipe. And what you are reading is the tidy version of a messy process. That back and forth is the job, not a sign you are doing it wrong.
What is next
Two things I left out, both bigger visual jumps than anything above.
Depth layers, so the scene moves inside the card. That is the immersive effect from Pocket.
A live animation on the card face while the card itself turns in 3D. Almost nobody expects that, and given everything already built it is about two minutes of work.
Get more Rive tips
Weekly tutorials, new lessons, and Rive community highlights — no spam.