Rig a Character in Rive with Constraints: A Snowman That Resizes Itself
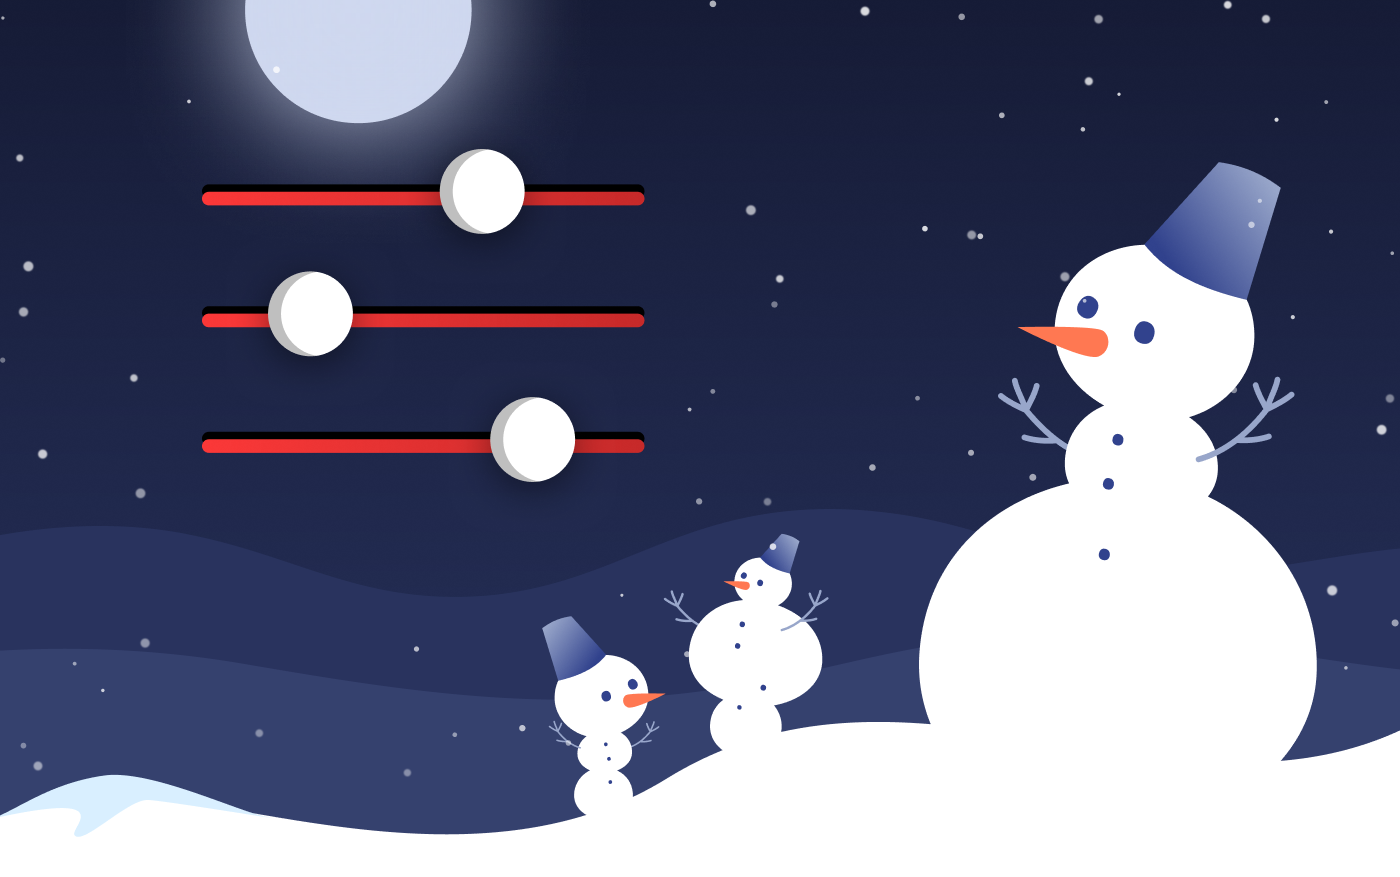
This is a snowman you can resize while it runs. Three sliders, one for each part of his body. Make the head tiny or the body huge, and the whole character adjusts to match.
It looks trivial, but it really isn't. Scaling one part is easy. Scaling one part and having everything above it move out of the way is the part that needs a trick. The tool behind that trick is a Constraint, which lets one element in your Artboard depend on another.
There are no Bones here and no code. Just groups, one setting called Freeze mode, and two Translation Constraints.
Why the snowman falls apart
Here is the same snowman without any connection between the parts. Each part is scaled on its own.
Scale the head and it looks fine, because nothing sits above it. Now scale the bottom ball. It grows, and the middle and the head stay exactly where they were. The snowman swallows itself.
So the idea is to build a chain. When the bottom grows, it pushes up the middle, and when the middle grows, it pushes up the head. The head sits at the top, so nothing depends on it.
If you want to follow along, the starter file is free: the snowman already split into named layers, before any of the steps below.
Download the Snowman Starter File
The starter file from the constraints tutorial: the snowman already split into named layers, before any groups or constraints. Open it in Rive and rig it along with the video.
Step 1 - Split the snowman into groups
Group the shapes by the parts you want to connect:
- Base - the snow on the ground
- Bottom - the bottom ball and its button
- Middle - the middle ball, its two buttons and the arms. The arms belong to the middle, so they move with it
- Head - the head, the hat, the eyes and the nose
Now each part can be scaled separately. But try scaling Bottom and you'll see it grows from its center, up and down at the same time. We want it to stay on the ground and only grow upward.
Step 2 - Move the Origin to the bottom (Freeze mode)
Select a group and you can see its Origin point. That is the point the group scales from, and when you create a group, Rive puts it in the center.
To move it without moving the group, press Y for Freeze mode. Now the handles move on their own. Drag the Origin down to the bottom edge of the group and press Enter to confirm.
Scale the group now and it grows from the ground up. Do the same for Middle and Head.
One thing to watch: if you drag the point without pressing Y first, you move the shape itself, not the Origin.
Step 3 - Create the joint
The parts now grow from their base, but they still don't push each other. Scale Middle and the head stays where it is.
What we need is a point that marks where two parts meet, and that moves when the lower part grows. That point is an empty group.
Press G to create an empty group and call it Joint Middle. Place it roughly where the bottom ball meets the middle one. It doesn't have to be exact.
Rive Masterclass + Rive Scripting
Master Rive for real products.
Get Both for $219Both courses for $219. Save $49.

Rive Masterclass + Rive Scripting
Master Rive for real products.
Both courses for $219. Save $49.
To make it easier to spot, change its Style from Group to Target. It's only visual: it turns into a small crosshair.
Now the important part: drag Joint Middle inside the Bottom group. Because it is a child of Bottom, when Bottom scales, the joint moves with the ball. Scale Bottom up and down and you can watch it ride along.
Step 4 - Tie the middle to the joint with a Translation Constraint
Select the Middle group and add a Translation Constraint. There are a few types of constraints, for scale or rotation for example. Translation copies the X and Y position of another element, which is exactly what we need.
Two settings:
- Target:
Joint Middle. The target is the element that drives this group. When it moves, Middle moves with it - Offset: ON. Offset keeps the group's starting position. Without it, Middle would jump onto the joint. With it, Middle stays where it is and only follows the joint's movement from now on
Nothing visible happens yet. Now move Joint Middle by hand and the middle part comes with it, even though you never touched the Middle group.
And then the payoff: scale the bottom ball.
The bottom grew, the joint inside it moved, and the middle followed the joint.
Step 5 - Do the same for the head
The head is not linked yet. And this time we don't link it to the bottom. We link it to the middle, because the head should follow whatever the middle does.
Same recipe:
- Empty group, call it
Joint Top, Style = Target - Place it where the middle meets the head, and put it inside the Middle group
- On Head, add a Translation Constraint, Target =
Joint Top, Offset ON
That closes the chain. The middle depends on the bottom, the head depends on the middle. Scale the bottom and the head moves too, because the bottom moved the middle and the middle moved the head.
The sliders
In the finished file the three sliders are bound to a View Model with three numbers, one per part, from 50 to 200 percent. They are not part of this tutorial, they only drive the scale of the three groups you just rigged. The rig is what makes them work: the same two joints and two constraints, nothing extra.
The whole trick
A group inside a group, and one constraint for each connection.
That pattern works on any character, any time one part needs to follow another. I use it a lot in the Masterclass, for example to make an avatar's eyes follow its height when the character gets taller or shorter.
The arms here are still stiff. In the next one, we'll make them bend with Bones.
Get more Rive tips
Weekly tutorials, new lessons, and Rive community highlights — no spam.